Tuesday, December 10, 2013

Just Because

Hello Friends,

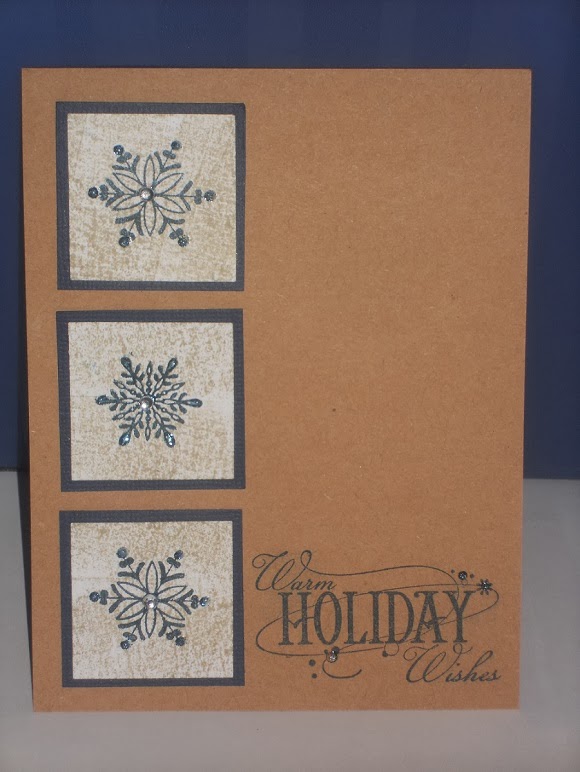
Here is a card that I made for PPP 10 min challenge #31-

CD_31

I kept it very simple. Base is A2 sized Kraft cardsotck. Cut some yellow polka dot DP and stamped the sentiment with Black Staz-on. I won this stamp set from another blog and was so excited to use it. Added some green paper trim on the border and added some twine and pearls. I did not have green pearls so this is colored by a stampin up wild wasabi  marker. Scored some lined on the base card and it was done. The card took me 7 mins and 58 sec to finish! It took me a little bit to try and figure out how to add those pearls.


Thanks for stopping by!
Amy

Saturday, November 23, 2013

Simple snowflake card

Hello,

Since my trip to India is postponed, I am channelizing my frustations to a productive cause. I wanted to try a new technique. Inspired by stamping just had that inspiration for me - card making painters tape technique.
This is for the WHW #124 Painters tape tutorial challenge


Here is my simple card - 

I took a white card stock and did the painters technique on it with crumb cake ink. Cut it into 1 3/8" square. Added snowflake with midnight muse ink. Outer dark blue layer is 1.5" square. Added the sentiment with midnight muse ink, added glitter and rhinestone to the center of snowflakes. Nothing fancy and the card is done.

I am also entering this for the
1. CHNC challenge extra for November
2. WCCC #51 Bling
Thanks for looking.

Happy Holidays.

Tuesday, October 29, 2013

Snow buddies

Here I am making christmas cards with my friend and she had this stamp from Hero Arts. I told her I had to borrow this one because I would love to make some cards with it. This is what I came up with

Stamped the image on white cardstock. Colored in with multiple SU markers and water color pencil. Added glitter and glossy accent. The paper with the image is torn only at the edges and then snipped around the outline with scissors. Added dimensional only behind the top of snow people and the base is glued. Here is a close pic of what I mean with all the mumbo jumbo above :) -

Lastly, topmost layer is torn, added glitter along the torn edge and added sentiment.

I really like the way this card turned out. I will have to make a few more and give some to the friend who let me borrow this stamp set.
I am entering this for
1. SCS CAS244 Challenge for tearing and/or distressing.
2. CHNC challenge extra for October
3. Rudolf Day

Thanks for looking. I hope you like it and share your thoughts.

Amy


Wednesday, October 16, 2013

Gift card holder

Finally the weather is cooler! Seems like we skipped fall and winter is here. Plus we got rain ..Yay!

So getting back to posting a card - Here is mine for the 10 minute craft dash #28.

CD_28

I love turquoise - be it card, jewelry, clothes. So I jumped right in and made this. It is a money holder card. 


Took a turquoise paper sprinkled with silver pattern - Made me think of snow - to make the base. Heat embossed Merry Christmas with red EP. I was a little disappointed that the red turned to a blackish color on this paper afgter embossing but ... I guess it looks ok. Punched out a circle with 1 3/8" on the outer flap. Added the scallop ring with silver paper around it. The tree is an inset, glued on the inside on a red circle. Added glitter (ofcourse), star and ribbon for embellishment. 

Took me 7.58 mins to finish. Easy breezy! 

Oh - the hand crafted sentiment you see - is totally an unexpected discovery. I placed that block below my card to angle it up a bit - just so my money holder top flap would stay down. When I downlaoded the pics .. discovered the hand crafted sentiment peeking. I went -mmm.. that looks good. So I kept it.

Thanks for peeking. Leave a comment if you get a chance.

Amy.


Thursday, September 26, 2013

O Christmas Tree

I have realized challenges are one of the ways for me to get projects done. Here are few cards that I made for challenge #32 'GAME SET MATCH' for A blog named Hero. This is my first entry for this blog. Thanks for the inspiration.


Christmas tree is made using the paper folding technique - Cut a circle in half and then add 3 folds. And voila - there is the tree. I added glitter at the ends to add interest. Layered the tree on an embossed snowflake panel with dimensionals.

Here is a close up -


These will also be my project cards for a swap that I am participating. Yay!
I am also entering this for the

Simon Says Stamp Wednesday Challenge - Anything goes.
Art Impressions blog - Challenge #119 Anything goes.
Crafty Hazelnut's Christmas Challenge Extra - Anything goes.
Inspired by Stamping holiday theme

Inspired-by-Stamping-Sept-B
Thanks for peeking. Please share your thoughts if you have a minute. 
Amy

Wednesday, September 25, 2013

DD #71

This week is my first to join the dynamic duos challenge. Here is the color palette - Crumb Cake and Basic Black with Wet Embossing as the 'Dessert Option'.


Here is my card


Layered Kraft cardstock on black cardstock. Added some dots with glossy accents to give dew drop effect. Not sure if I would do this again. (Still debating). Image is wet embossed with black detail EP using SU pocket silhouette set. Placed it on black cardstock and punched the bottom border. Sentiment is stamped with SU ink and added bow using regular embroidery thread. I am out of natural twine.


A little closer look.

Here is a close up of my center.


Thanks for stopping by and leaving a comment!

Amy.

Thursday, September 19, 2013

Sparkle Snowflake


I am so glad to be able to play again with my inks and stamps. I am jumping ahead and making some Christmas cards for this challenge. Here is the color palette
CD_26
Colors: Azure Blue, Gray, Cherry Red

And here is my card 


And here is a close up (my photography needs training)


Punched out the snowflake from 2 shades of grey cardstock. Glued it together and added stickles. Punched out cirlces from red and blue xmas paper and randomly glued them. Added gemstone for added fun. Added double score lines around the 2.25" square. Sentiment is from PTI stamps.

Time to finish - 9mins and 10 sec

Weather is cooling here in West TX. Love this weather and my tea. Time to bring out the warm clothes.

Thanks for looking. Leave a note if you get a chance.

Amy

Thursday, July 25, 2013

Tea-inking of you

Here is the color palatte for the pretty in posh 

10 Minute Craft Dash #22

CD_22


And here is my card. 

The stamp set is Everyday Classics from PTI and SU colors - calypso coral, lucky limade and pacific point. Finsh time - 9.05.6 :) 

Stamped the tea cup images with the 3 co-ordinating challenge colors, then the sentiment with SU markers on a 4 x 5.25" white cardstock. When adding the twine, as I was going to make the bow knot .. I decided I wanted to add on a button. It took me a little bit to find the right button as I did not have it ready before I started the timer on this project. The steam coming from the cup is done in silver pen and added rhinestone at the end of it. Added this layer to an A2 size white card. So glad I made it within the time frame.


Thanks for looking.
Amy

Wednesday, June 26, 2013

cheerful colorful birthday frogs

Colorful frogs for birthday ... Anyone??    


This is my card for CAS on Sunday - Challenge #11, one layer wonder. Colors were inspired by SCS CAS226 challenge. I stamped the frog and hat images using SU stamp set turtle & Co. Colored them with watercolor pencils and blended them with aquapainter. Added a little gray below the frogs .. On hindsight I should have added green perhaps. Stamped sentiment with Stazon black and its done. 

Thanks for hopping by! 

Birthday butterflies

Here is my second card for the 
CD_20

I had to give it another go as my first card went over 10 mins. So here is my second card that I  finished in 9.51 minutes :) . Yay! I embossed the butterflies with white EP on grey cardstock and then used MS punch to cut them.  Background is stamped with french script (SU) in more mustard. Added a border with grey cardstock and then tied a pink ribbon. Stamped the sentiment and adhered it to the base card. 


I am really enjoying participating in these challenges. It really helps my creative side.
Thanks for stopping by! Stay cool! 

Thursday, June 20, 2013

Birthday flowers


Here is my card for the 
CD_20


Seems like I have been on a vacation for a long time. Finally getting around to making some cards again. This card took me longer than 10 mins but I love the way it turned out. 

Made the 3 flowers (matching the challenge color palatte) using the boho blossom punch from SU. It took more time than I expected ... but I made them for the first time so now I know. :) Secured it with a silver brad. Stamped the flower image from SU pocket silhouette using markers. Vase is from CTMH stamp set - cut it and added glossy accents on top. Set aside to dry. 
Meanwhile stamped the birthday image in SU ink melon mambo and then ran the base card through CB - modern wallpaper folder. I just recently bought that one and was itching to use it :). 

Added the vase and flowers on a panel with scorelines on the border. Added the panel to the base card. Wrapped some yellow twine and Yipee ... Done. 

It took me 11.03 minutes to complete the card. Sigh! Maybe I can make another card for this challenge. 


Share your thoughts if you have a minute.
Enjoy!

Saturday, May 25, 2013

Butterflies

Here is my card for the 10 min craft dash #18. Butterflies stamps from  Inkadinkado Butterflies Cling stamp.  It took me 8 min 55 sec to finish. Few minutes were spared as I already had one butterfly previously made (for another project but did not use it then).  I am not sure if that is ok to do in the challenge. I will have to find out. 


Here's a close of the butterflies -


Ran the kiwi kiss base card through big shot to dry emboss the Spellbinders label 8 and used white gel pen to bring out the border. Stamped sentiment with versamark and embossed with white embossing powder. Glued the center of the butterflies to card base (saving time not using the dimensionals :) Stamped the vines with baroque motifs (SU) with kiwi kiss ink. Added some glitter and ready to stick embellishments.


Share your thoughts. Thanks.
Amy